14 KiB
English | 中文
Features
🌍 Chinese supported mandarin and tested with multiple datasets: aidatatang_200zh, magicdata, aishell3, data_aishell, and etc.
🤩 PyTorch worked for pytorch, tested in version of 1.9.0(latest in August 2021), with GPU Tesla T4 and GTX 2060
🌍 Windows + Linux run in both Windows OS and linux OS (even in M1 MACOS)
🤩 Easy & Awesome effect with only newly-trained synthesizer, by reusing the pretrained encoder/vocoder
🌍 Webserver Ready to serve your result with remote calling
DEMO VIDEO
Ongoing Works(Helps Needed)
- Major upgrade on GUI/Client and unifying web and toolbox
[X] Init framework
./mkguiand tech design [X] Add demo part of Voice Cloning and Conversion [X] Add preprocessing and training for Voice Conversion [ ] Add preprocessing and training for Encoder/Synthesizer/Vocoder - Major upgrade on model backend based on ESPnet2(not yet started)
Quick Start
1. Install Requirements
1.1 General Setup
Follow the original repo to test if you got all environment ready. **Python 3.7 or higher ** is needed to run the toolbox.
- Install PyTorch.
If you get an
ERROR: Could not find a version that satisfies the requirement torch==1.9.0+cu102 (from versions: 0.1.2, 0.1.2.post1, 0.1.2.post2 )This error is probably due to a low version of python, try using 3.9 and it will install successfully
- Install ffmpeg.
- Run
pip install -r requirements.txtto install the remaining necessary packages. - Install webrtcvad
pip install webrtcvad-wheels(If you need)
1.2 Setup with a M1 Mac
The following steps are a workaround to directly use the original
demo_toolbox.pywithout the changing of codes.Since the major issue comes with the PyQt5 packages used in
demo_toolbox.pynot compatible with M1 chips, were one to attempt on training models with the M1 chip, either that person can forgodemo_toolbox.py, or one can try theweb.pyin the project.
1.2.1 Install PyQt5, with ref here.
- Create and open a Rosetta Terminal, with ref here.
- Use system Python to create a virtual environment for the project
/usr/bin/python3 -m venv /PathToMockingBird/venv source /PathToMockingBird/venv/bin/activate - Upgrade pip and install
PyQt5pip install --upgrade pip pip install pyqt5
1.2.2 Install pyworld and ctc-segmentation
Both packages seem to be unique to this project and are not seen in the original Real-Time Voice Cloning project. When installing with
pip install, both packages lack wheels so the program tries to directly compile from c code and could not findPython.h.
-
Install
pyworldbrew install pythonPython.hcan come with Python installed by brewexport CPLUS_INCLUDE_PATH=/opt/homebrew/Frameworks/Python.framework/HeadersThe filepath of brew-installedPython.his unique to M1 MacOS and listed above. One needs to manually add the path to the environment variables.pip install pyworldthat should do.
-
Install
ctc-segmentationSame method does not apply to
ctc-segmentation, and one needs to compile it from the source code on github.git clone https://github.com/lumaku/ctc-segmentation.gitcd ctc-segmentationsource /PathToMockingBird/venv/bin/activateIf the virtual environment hasn't been deployed, activate it.cythonize -3 ctc_segmentation/ctc_segmentation_dyn.pyx/usr/bin/arch -x86_64 python setup.py buildBuild with x86 architecture./usr/bin/arch -x86_64 python setup.py install --optimize=1 --skip-buildInstall with x86 architecture.
1.2.3 Other dependencies
/usr/bin/arch -x86_64 pip install torch torchvision torchaudioPip installingPyTorchas an example, articulate that it's installed with x86 architecturepip install ffmpegInstall ffmpegpip install -r requirements.txtInstall other requirements.
1.2.4 Run the Inference Time (with Toolbox)
To run the project on x86 architecture. ref.
vim /PathToMockingBird/venv/bin/pythonM1Create an executable filepythonM1to condition python interpreter at/PathToMockingBird/venv/bin.- Write in the following content:
#!/usr/bin/env zsh
mydir=${0:a:h}
/usr/bin/arch -x86_64 $mydir/python "$@"
chmod +x pythonM1Set the file as executable.- If using PyCharm IDE, configure project interpreter to
pythonM1(steps here), if using command line python, run/PathToMockingBird/venv/bin/pythonM1 demo_toolbox.py
2. Prepare your models
Note that we are using the pretrained encoder/vocoder but not synthesizer, since the original model is incompatible with the Chinese symbols. It means the demo_cli is not working at this moment, so additional synthesizer models are required.
You can either train your models or use existing ones:
2.1 Train encoder with your dataset (Optional)
-
Preprocess with the audios and the mel spectrograms:
python encoder_preprocess.py <datasets_root>Allowing parameter--dataset {dataset}to support the datasets you want to preprocess. Only the train set of these datasets will be used. Possible names: librispeech_other, voxceleb1, voxceleb2. Use comma to sperate multiple datasets. -
Train the encoder:
python encoder_train.py my_run <datasets_root>/SV2TTS/encoder
For training, the encoder uses visdom. You can disable it with
--no_visdom, but it's nice to have. Run "visdom" in a separate CLI/process to start your visdom server.
2.2 Train synthesizer with your dataset
-
Download dataset and unzip: make sure you can access all .wav in folder
-
Preprocess with the audios and the mel spectrograms:
python pre.py <datasets_root>Allowing parameter--dataset {dataset}to support aidatatang_200zh, magicdata, aishell3, data_aishell, etc.If this parameter is not passed, the default dataset will be aidatatang_200zh. -
Train the synthesizer:
python synthesizer_train.py mandarin <datasets_root>/SV2TTS/synthesizer -
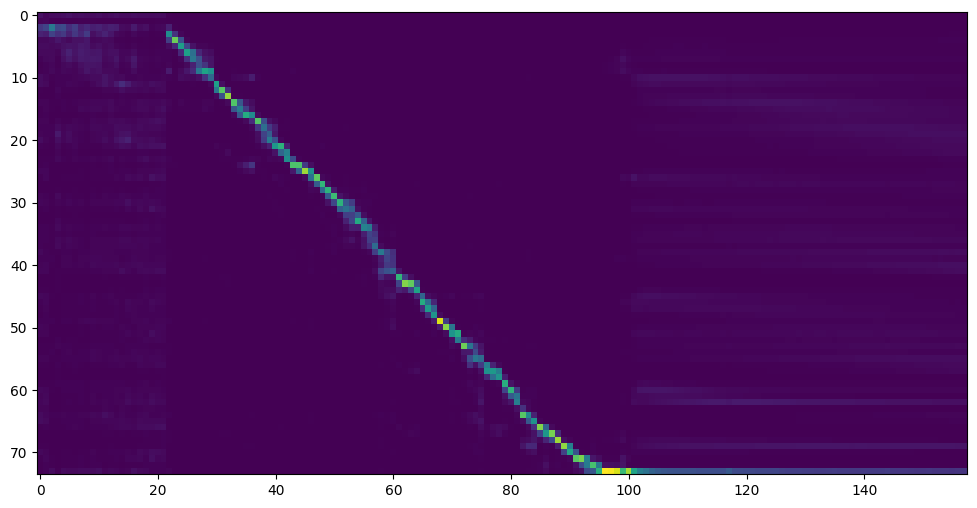
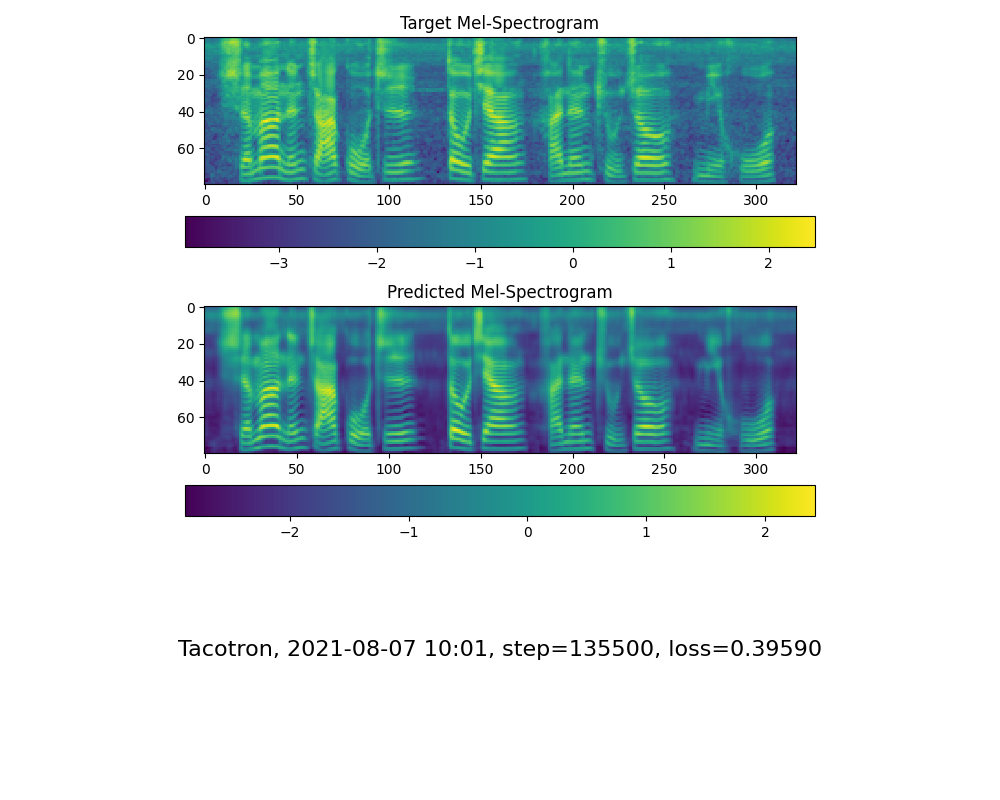
Go to next step when you see attention line show and loss meet your need in training folder synthesizer/saved_models/.
2.3 Use pretrained model of synthesizer
Thanks to the community, some models will be shared:
| author | Download link | Preview Video | Info |
|---|---|---|---|
| @author | https://pan.baidu.com/s/1iONvRxmkI-t1nHqxKytY3g Baidu 4j5d | 75k steps trained by multiple datasets | |
| @author | https://pan.baidu.com/s/1fMh9IlgKJlL2PIiRTYDUvw Baidu code:om7f | 25k steps trained by multiple datasets, only works under version 0.0.1 | |
| @FawenYo | https://drive.google.com/file/d/1H-YGOUHpmqKxJ9FRc6vAjPuqQki24UbC/view?usp=sharing https://u.teknik.io/AYxWf.pt | input output | 200k steps with local accent of Taiwan, only works under version 0.0.1 |
| @miven | https://pan.baidu.com/s/1PI-hM3sn5wbeChRryX-RCQ code: 2021 https://www.aliyundrive.com/s/AwPsbo8mcSP code: z2m0 | https://www.bilibili.com/video/BV1uh411B7AD/ | only works under version 0.0.1 |
2.4 Train vocoder (Optional)
note: vocoder has little difference in effect, so you may not need to train a new one.
- Preprocess the data:
python vocoder_preprocess.py <datasets_root> -m <synthesizer_model_path>
<datasets_root>replace with your dataset root,<synthesizer_model_path>replace with directory of your best trained models of sythensizer, e.g. sythensizer\saved_mode\xxx
-
Train the wavernn vocoder:
python vocoder_train.py mandarin <datasets_root> -
Train the hifigan vocoder
python vocoder_train.py mandarin <datasets_root> hifigan
3. Launch
3.1 Using the web server
You can then try to run:python web.py and open it in browser, default as http://localhost:8080
3.2 Using the Toolbox
You can then try the toolbox:
python demo_toolbox.py -d <datasets_root>
3.3 Using the command line
You can then try the command:
python gen_voice.py <text_file.txt> your_wav_file.wav
you may need to install cn2an by "pip install cn2an" for better digital number result.
Reference
This repository is forked from Real-Time-Voice-Cloning which only support English.
| URL | Designation | Title | Implementation source |
|---|---|---|---|
| 1803.09017 | GlobalStyleToken (synthesizer) | Style Tokens: Unsupervised Style Modeling, Control and Transfer in End-to-End Speech Synthesis | This repo |
| 2010.05646 | HiFi-GAN (vocoder) | Generative Adversarial Networks for Efficient and High Fidelity Speech Synthesis | This repo |
| 2106.02297 | Fre-GAN (vocoder) | Fre-GAN: Adversarial Frequency-consistent Audio Synthesis | This repo |
| 1806.04558 | SV2TTS | Transfer Learning from Speaker Verification to Multispeaker Text-To-Speech Synthesis | This repo |
| 1802.08435 | WaveRNN (vocoder) | Efficient Neural Audio Synthesis | fatchord/WaveRNN |
| 1703.10135 | Tacotron (synthesizer) | Tacotron: Towards End-to-End Speech Synthesis | fatchord/WaveRNN |
| 1710.10467 | GE2E (encoder) | Generalized End-To-End Loss for Speaker Verification | This repo |
F Q&A
1.Where can I download the dataset?
| Dataset | Original Source | Alternative Sources |
|---|---|---|
| aidatatang_200zh | OpenSLR | Google Drive |
| magicdata | OpenSLR | Google Drive (Dev set) |
| aishell3 | OpenSLR | Google Drive |
| data_aishell | OpenSLR |
After unzip aidatatang_200zh, you need to unzip all the files under
aidatatang_200zh\corpus\train
2.What is<datasets_root>?
If the dataset path is D:\data\aidatatang_200zh,then <datasets_root> isD:\data
3.Not enough VRAM
Train the synthesizer:adjust the batch_size in synthesizer/hparams.py
//Before
tts_schedule = [(2,  1e-3,  20_000,  12),   # Progressive training schedule
                (2,  5e-4,  40_000,  12),   # (r, lr, step, batch_size)
                (2,  2e-4,  80_000,  12),   #
                (2,  1e-4, 160_000,  12),   # r = reduction factor (# of mel frames
                (2,  3e-5, 320_000,  12),   #     synthesized for each decoder iteration)
                (2,  1e-5, 640_000,  12)],  # lr = learning rate
//After
tts_schedule = [(2,  1e-3,  20_000,  8),   # Progressive training schedule
                (2,  5e-4,  40_000,  8),   # (r, lr, step, batch_size)
                (2,  2e-4,  80_000,  8),   #
                (2,  1e-4, 160_000,  8),   # r = reduction factor (# of mel frames
                (2,  3e-5, 320_000,  8),   #     synthesized for each decoder iteration)
                (2,  1e-5, 640_000,  8)],  # lr = learning rate
Train Vocoder-Preprocess the data:adjust the batch_size in synthesizer/hparams.py
//Before
### Data Preprocessing
        max_mel_frames = 900,
        rescale = True,
        rescaling_max = 0.9,
        synthesis_batch_size = 16,                  # For vocoder preprocessing and inference.
//After
### Data Preprocessing
        max_mel_frames = 900,
        rescale = True,
        rescaling_max = 0.9,
        synthesis_batch_size = 8,                  # For vocoder preprocessing and inference.
Train Vocoder-Train the vocoder:adjust the batch_size in vocoder/wavernn/hparams.py
//Before
# Training
voc_batch_size = 100
voc_lr = 1e-4
voc_gen_at_checkpoint = 5
voc_pad = 2

//After
# Training
voc_batch_size = 6
voc_lr = 1e-4
voc_gen_at_checkpoint = 5
voc_pad =2
4.If it happens RuntimeError: Error(s) in loading state_dict for Tacotron: size mismatch for encoder.embedding.weight: copying a param with shape torch.Size([70, 512]) from checkpoint, the shape in current model is torch.Size([75, 512]).
Please refer to issue #37
5. How to improve CPU and GPU occupancy rate?
Adjust the batch_size as appropriate to improve
6. What if it happens the page file is too small to complete the operation
Please refer to this video and change the virtual memory to 100G (102400), for example : When the file is placed in the D disk, the virtual memory of the D disk is changed.
7. When should I stop during training?
FYI, my attention came after 18k steps and loss became lower than 0.4 after 50k steps.


