|
|
||
|---|---|---|
| .gitignore | ||
| .gitpod.yml | ||
| CMakeLists.txt | ||
| Dockerfile | ||
| Readme.md | ||
| anaglyph.jpg | ||
| geometry.h | ||
| out.jpg | ||
| tinyraytracer.cpp | ||
| trace.png | ||
Readme.md
Understandable RayTracing in 256 lines of bare C++
This repository is a support code for my computer graphics lectures. It is not meant to be the ultimate rendering code or even physically realistic. It is meant to be simple. This project is distributed under the DO WHAT THE FUCK YOU WANT TO PUBLIC LICENSE.
Check the wiki that accompanies the source code. The second raytracing chapter is available in the tinykaboom repository. If you are looking for a software rasterizer, check the other part of the lectures.
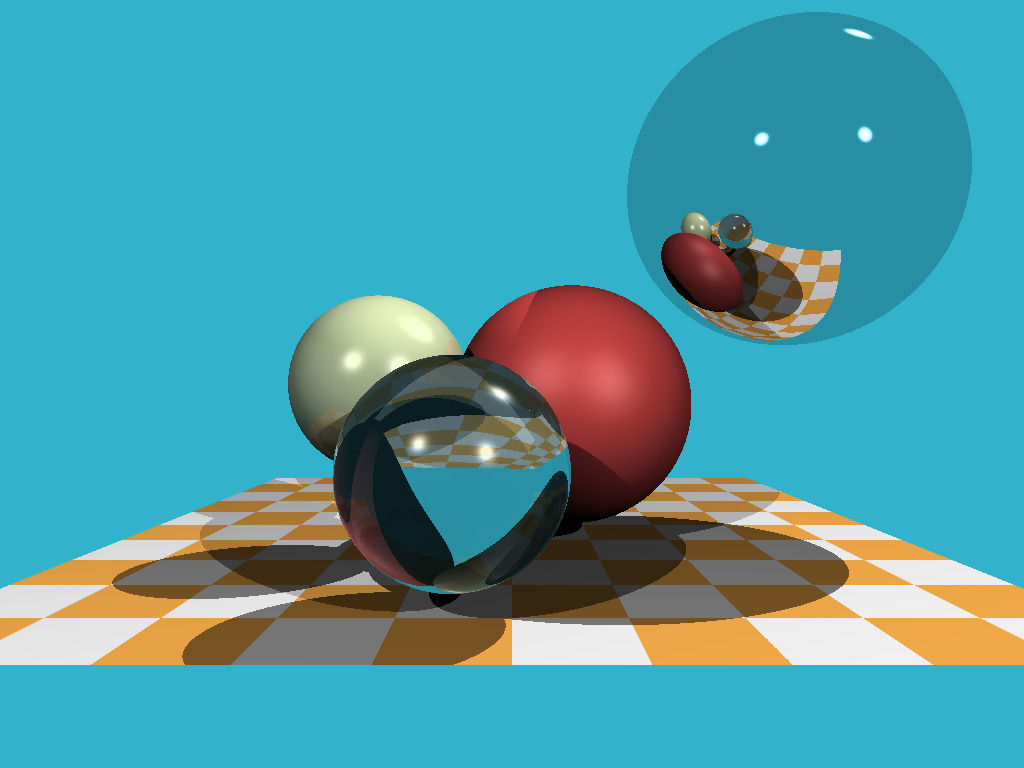
In my lectures I tend to avoid third party libraries as long as it is reasonable, because it forces to understand what is happening under the hood. So, the raytracing 256 lines of plain C++ give us this result:
compilation
git clone https://github.com/ssloy/tinyraytracer.git
cd tinyraytracer
mkdir build
cd build
cmake ..
make
You can open the project in Gitpod, a free online dev evironment for GitHub:

On open, the editor will compile & run the program as well as open the resulting image in the editor's preview. Just change the code in the editor and rerun the script (use the terminal's history) to see updated images.